
Faux Wormholes, Antiquing Lumber Series

Many of you have asked how I make new wood look old. It's definitely a process, and so I wanted to share with you some of the techniques I use , along with what they do and why, so that you can mix and match as you'd like. Here's another technique for you!
The tool I use for this technique looks like a medieval torture device. It's designed to make lots of little tiny holes in wood similar to those made by small worms and beetles when they eat old lumber, especially my arch nemesis Powderpost beetles. You can sit there for hours with an awl or sharp stabby device, but who has time for that. This process takes long enough as it is.
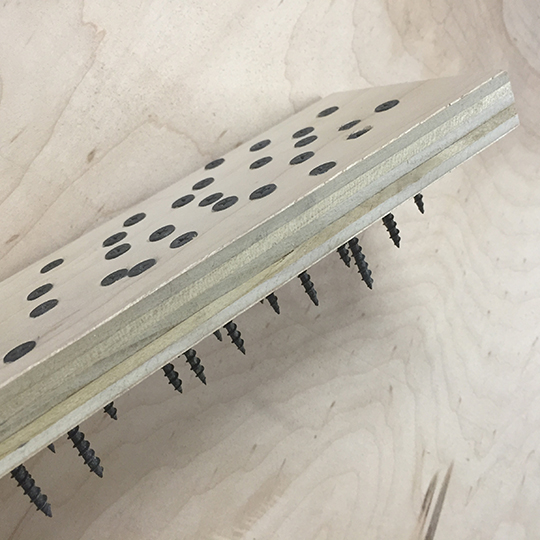
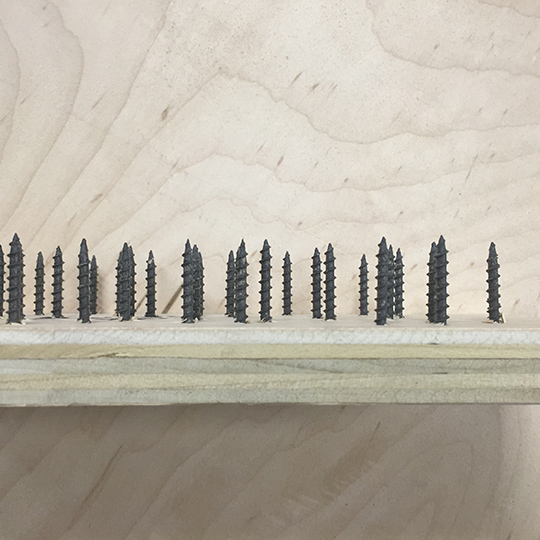
Instead, there's this, the torture device. I used a scrap piece of plywood I had in the studio and 1.5" drywall screws to make it. Pre-drill a bunch of holes with a small bit randomly over across the board, trying to keep them as perfectly straight as possible. Then, put in the screws, pushing them through the board so the sharp ends are as close to level as you can make them.
They don't have to be as long as mine are. All you need is about a 1/4" of exposed screw tip to gouge the little holes and you're good.
(Oh, and please do not use this on people...It's for wood only. Maybe clay or something. But not people. Use of this tool is for adults only and at your own risk.)
Then, you attack the lumber. Holding the block like a chalkboard eraser (do they even still make those?), slap the sharp side of the screws into the face of the wood. Repeatedly. Like, a lot. Some of the holes will be a little deeper than others, and that's fine. Remember, you're trying to make it look 'organic', so you can get away with a fair bit of sloppiness.
If the board has a pretty wide center, like the board on the right does, I like to focus on that area. Its a tiny thing, but I like details like that. Bugs like powderpost beetles tend to eat more of the outside or the deep inside of wood, occasionally passing through the middle. Consider it a nod to authenticity, but really, just make a bunch of small holes.
Once you've pulverized the board, it's time to apply the stain. With a dark stain like this (I used Minwax Early American) the pigment and base that make up the wood stain will sink into the holes more than the face of the wood. It's sort of like marinading meat; the seasonings are filling in the broken fibers and leaching into the surface better than if they just puddle on top. Now that I'm no longer hungry, I can continue.
I like to use a pretty heavy amount of stain, and recommend using a natural bristle brush. It'll get into the small perforations a lot better. Then use a shop cloth, rag or paper towel to remove the excess that's sitting on the surface. You'll notice the holes are considerably darker than the surrounding area. As the stain dries, the stain that's in those holes will slowly spread into the wood around it, accenting them even more. Sort of like spalting (streaky black lines that look absolutely gorgeous in wood, more on that later).
If you're using a very light stain, and you want more contrast there's a little trick to it. Use a foam brush to apply a much lighter application of the lighter stain. You're really just trying to tint the surface, but not get too much in the holes. Repeat 2-3 times until it's the color you want. As soon as you do that, use a brush to apply a darker stain, like dark walnut, over the first stain. Immediately wipe off the excess. Don't let the stain sit there for more than a minute before wiping it off.
Essentially, you're trying to saturate the top layer of the wood with the lighter color, then get the darker stain into the pores you've made. Another way is to apply the dark stain first as normal, then come back and sand off the surface of the wood once it's fully dry. Then you put the lighter stain on. But that takes time...and I'm usually too impatient...
Anyway, use this in conjunction with the rest of the techniques to get better looking, faux antiqued wood! Just remember to seal the project with polyurethane or polyacrylic when you're done!
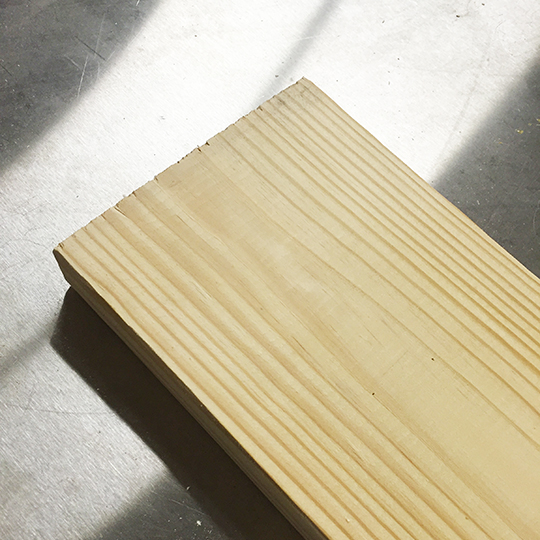
A fresh clean pine board, ready to get slapped.

Make sure to hold the smooth side...hey, I've just got to say it.

Holier than thou (I had to...)

Stain time!

Removing the excess stain
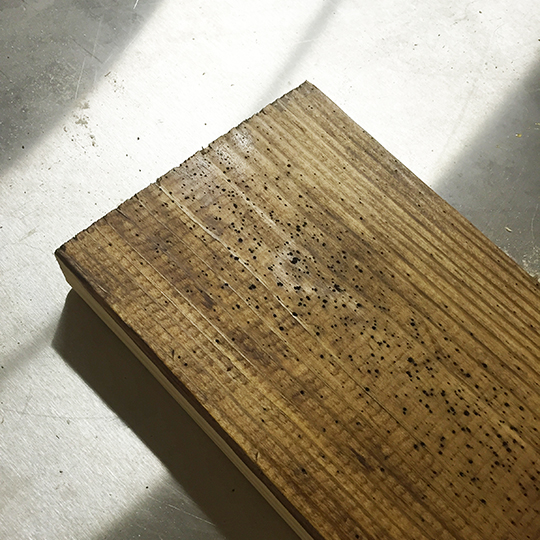
Voila, a worm eaten board!