

Vices and Vermin Silhouettes, a Q+A
5 Questions:
Why liquor bottles, mice and pigeons?
I love the idea of ‘vices and vermin’, but done in a clean, simple and beautiful way. I use my work to talk about real life, but I work hard to make them with aesthetics in mind as well. I say this half jokingly, it talks about alcoholism, but like, cute. I’m sitting at home, unable to work because of the plague, so why not make personal work about what I’m seeing and thinking about it. It’s a little dark sometimes, but that’s fine.
I’m human.
Favorite detail:
The mice. I love them. . . they add a little more lightheartedness to an otherwise potentially heavy project.
Why wood?
There’s a subtle masculinity to wood, but because of the soft hues and organic grain, it also feel soft and curvy. There’s also strong inference to scandinavian design aesthetic. I like that it’s a relatively dark subject matter portrayed in modern design. It feels light and fresh, and feels pretty.

Is this part of a series or a one off?
I love the idea that this is a snippet of conversation. It went on long before this version and it’ll continue after. There’s something nice about the simplified items that I enjoy, and I think this narrative device is versatile enough to carry other conversation topics too. All that’s really just art speak bullshit, but yes, I’ll be using them again.
Where do you see this piece going?
This is one of those pieces that I’d love to see in someone’s home. It’s one of the most versatile pieces I’ve made, in that it can go anywhere. They can be arranged on a side table, like I did, or integrated into a bookshelf to add interest. They could even be put up on picture ledges to install on a wall.
The best part is that if you get bored with it, or your home design changes, just move them around.
Personal Work

Engraved marble slab, framed in oak.
My work as Handy Dandy is very different from my art work as James Worsham.
Handy Dandy is more versatile. It’s geared towards amazing design that showcases creativity with brand aesthetics in mind. The artist as James Worsham, the man behind the bow tie Handy Dandy Productions, is a little different.
I’ve never utilized art to express things about myself. I never felt I had anything to say with it. Instead, I told stories and jokes in person, making sure everyone was taken care of and had a good time. I use my humor as a mask and a coping mechanism, and that’s totally fine, but it also leads to a lot of things getting swept under the carpet. My uncle passed away this last winter. He was an artist and fellow gay dude who suffered from depression so great that he took the worst way out. I didn’t really wrap my brain around this until I saw his artwork again in person and realized that my work is my voice. I needed to use it to say things I couldn’t really express otherwise.
I started thinking through a lot of my ‘classic stories’ that I use to make light of otherwise serious situations or just ignored entirely. Drug addictions of people close to me, being a butch gay in drag race world, or even the loneliness of being an ambitious self-employed art kid. They’re not even all bad things. I’m never going to be somber, and that’s fine. I should use those things too.
I recently started a small series of marble slabs engraved with golden pills. I enjoy the fact that people can view this as a tongue-in-cheek reference to party drugs, but to me, it’s not. It’s darker and heavier. It’s also something I’m not exactly ready to write on a blog just yet. It deals with addiction, and glorification, and literally setting something in stone. But, by making work about it, I’m becoming more comfortable with it. I’m processing it. It’s not my own addiction issues, and if anything, it’s led me to be almost phobic of pills and medications entirely.
I’m looking forward to this new process and thought-line. If anything, I think it will make my work as Handy Dandy even better.

Tips and Tricks: Jig 1
I think people would be surprised but the amount of design that has to go into my projects. Using unexpected materials is such a great challenge, but it often means there isn't a ready made or fiscally smart tool to do what I need. I figured I'd start sharing some of the behind the scenes design I get to do. So, as part of the Tips and Tricks collection, here's another jig.
So, what do you think this one does?
Check out the video below to find out:
Yep, that's right. It's an extra fancy, extendable semi-ergonomic straw length gauge. I needed a way to cut around 4,000 straws to the same length. My chop saw DESTROYED the straws, and my band saw melted them into a solid (but still kind of cool. . . ) block. So this worked great! The static cling of the straws made them stick to the inside of the jig, so I cut a vent in the front. The rubber bands keep them from flying all over the place (well, mostly) and then they just drop into a box.
So what do you think? Anyone else ever make something silly like this?
Carving out a little time for myself. . .
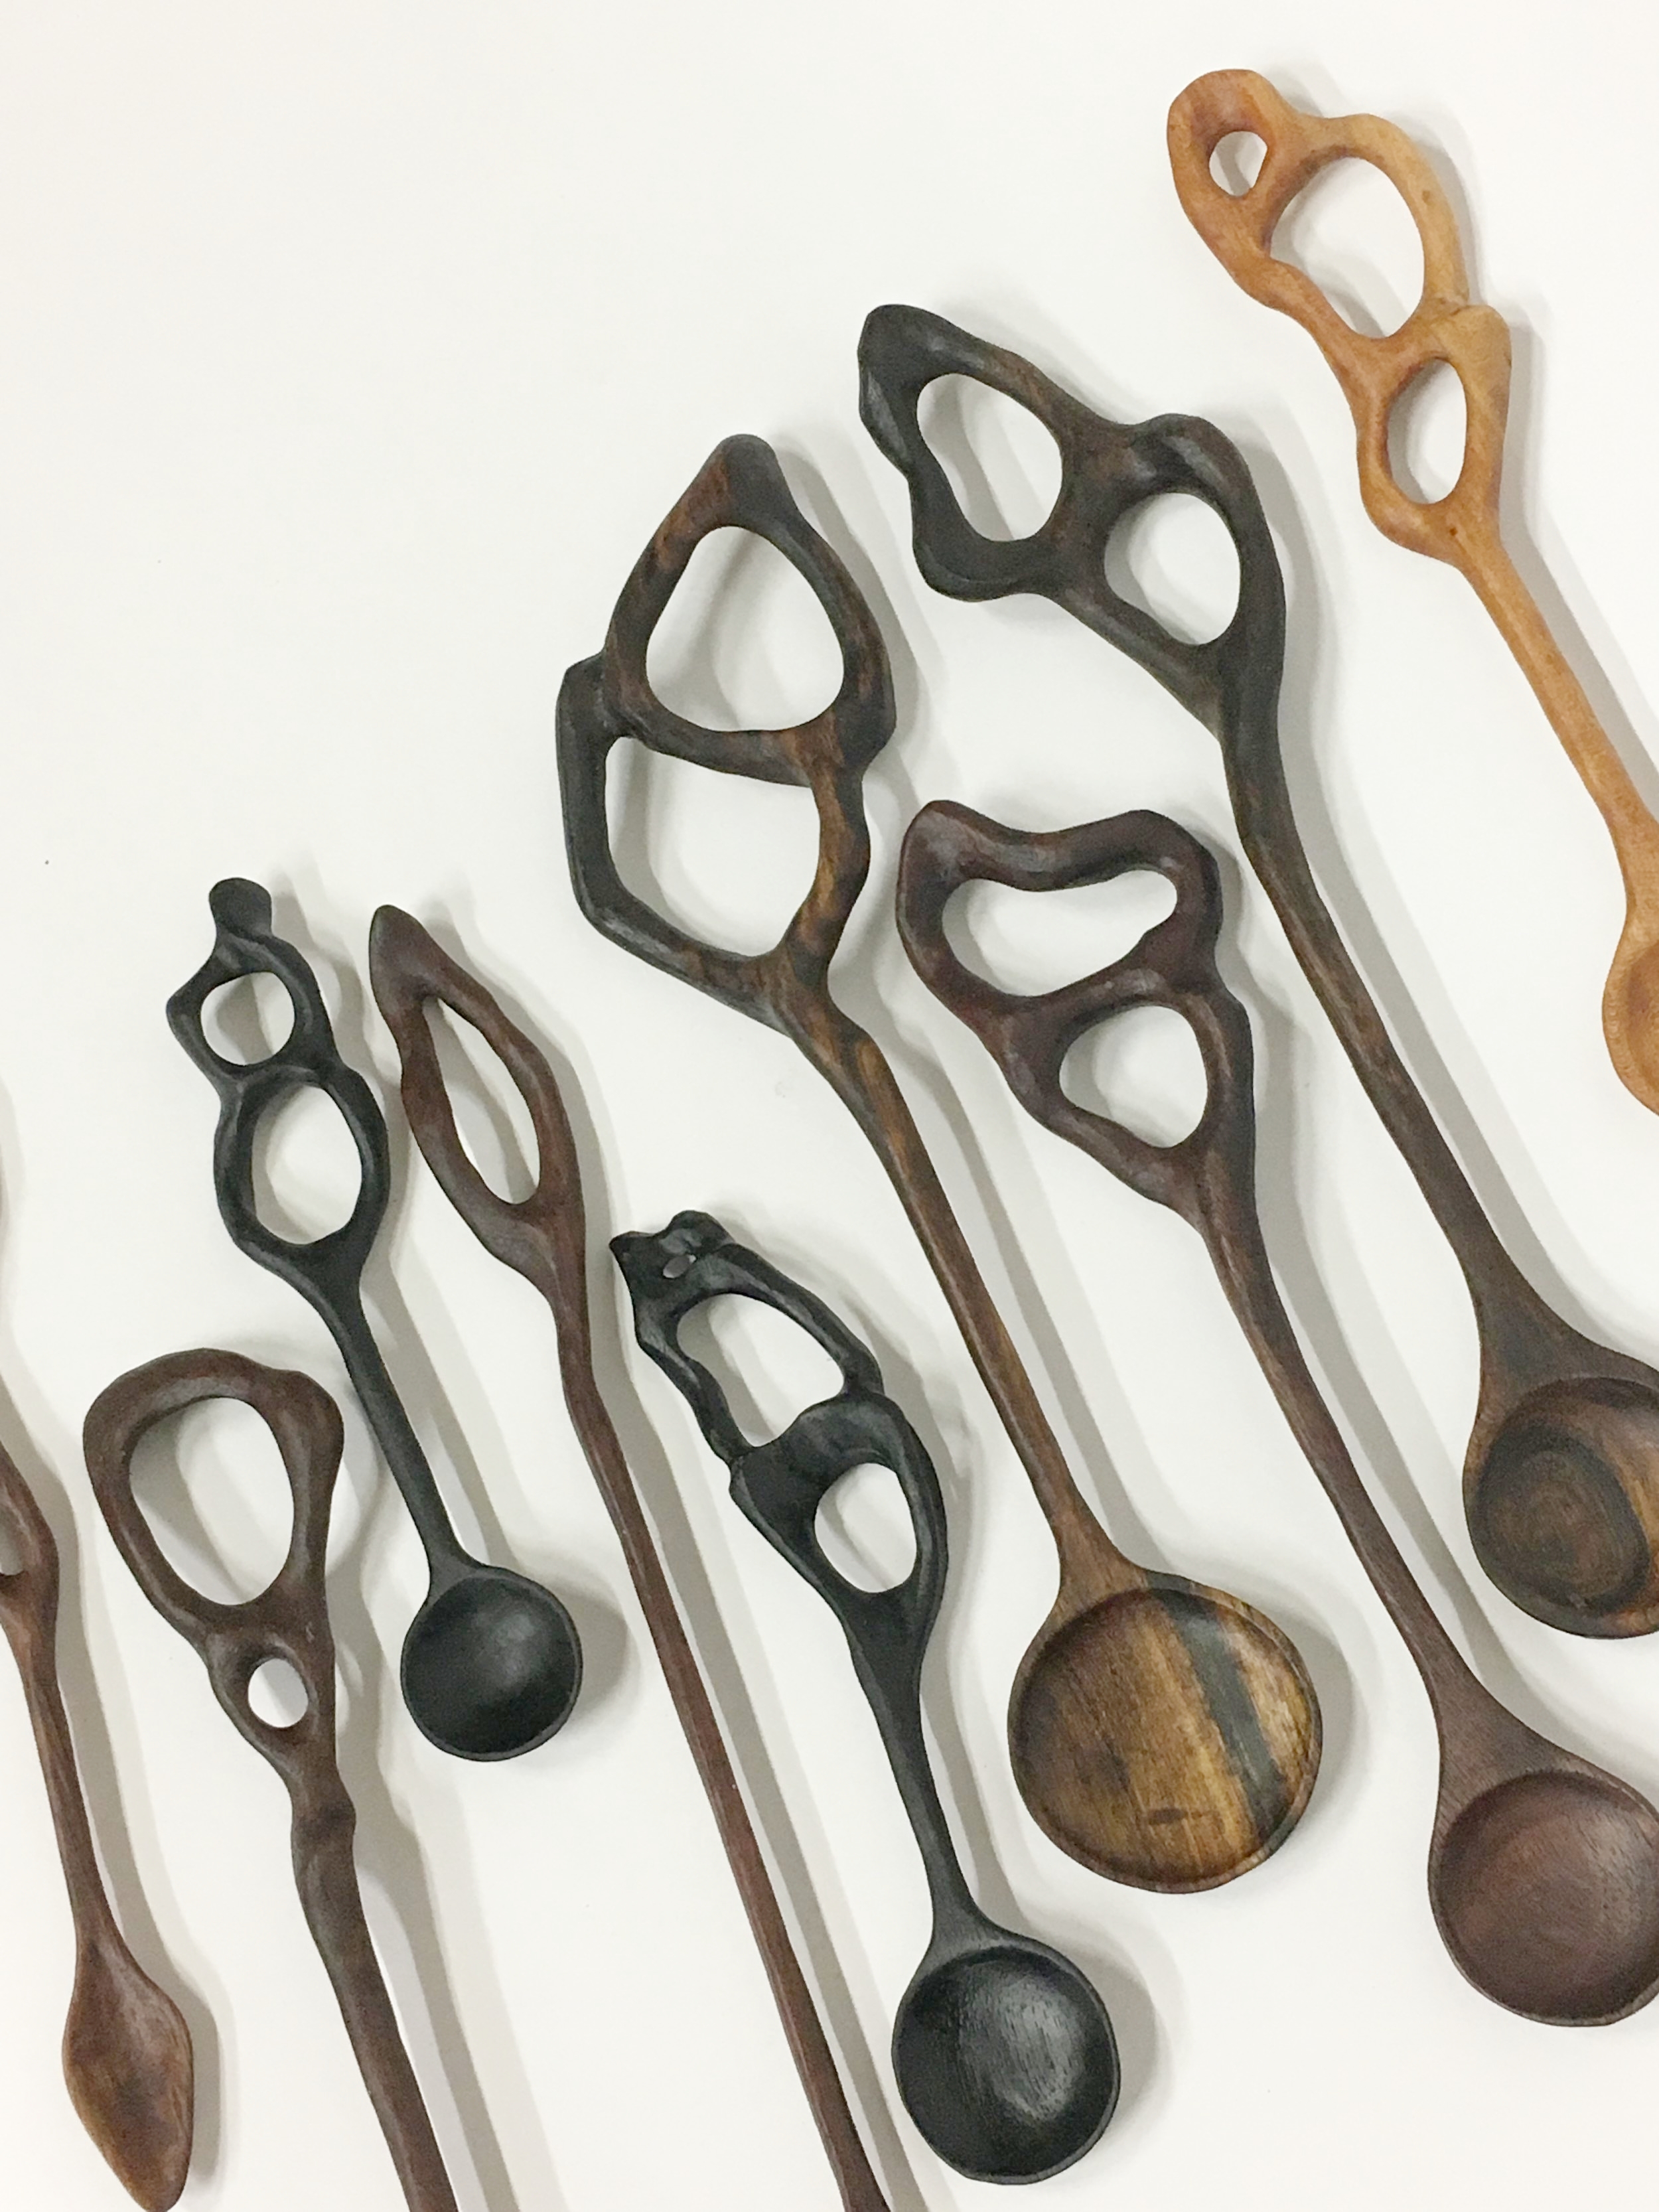
Spoons! Ebony, dark walnut, maple, bacote. . .so dang pretty!
Nothing stresses me out more than being incapable of making. It’s my stress relief, pure catharsis, for me to get something out of my head and into my hands. Most of my projects require days and weeks of work, so when I need a quick fix, I’ve found that carving is my go-to.
Especially, spoons.
Extra large spoons made for Memphis designer Sean Anderson
The biggest spoons were 18" long! Safety glasses for scale.
A perfectly round bowl, thin but not flimsy, with a rich grain and elegant form. It flows into a slightly rounded handle, thin as a switch but strong as it follows the grain. Then I introduce a little bit of chaos. The clean lines and minimal design degrade, they split, they grow, they expand. Holes are eaten away, but not in the normal way for wood. Instead, I draw my inspiration from how rock corrodes, or the knobs of bone joints. Merging these elements of visceral organic forms with contemporary clean lines is like music to me.
Starts off as a boring block of wood...
A few rough sketches...
Then the bowl gets carved, the silhouette is cut, and the handle gets rough shaped!
Planning for most of my spoons is nominal. I like using naturally felled, or cast off pieces that no one else likes as the base. I flatten one side, and start drawing directly on the lumber. I’m quite meticulous on the bowl. Lining up the handle, or stem as I sometimes think of them, and keeping that straight is important. It flows directly towards the center of the bowl. It’s classic and recognizable. Gives the carving purpose. From there, I drag the pencil around the excess to give myself a rough shape. Intentionally, I leave a lot of fluidity to this. The less control the better.
Cutting out this rough shape on a scroll saw, it’s then on to shaping and carving. Bowl comes first, in order to make sure I don’t fuck that up after having the whole thing finished. Then I use a mixture of belt sanders, rotary carvers and sand paper to shape the back of the bowl, the handle and decayed end. After sanding, the spoon gets oiled heavily (mineral oil and bees wax) and left overnight. I cure my spoons several times, which means washing them as you would for normal use, with warm soapy water, then letting them dry. Light sanding, oil, sit, wash and repeat. It helps guarantee that the spoon has soaked up as much oil as possible so that it last longer. More on this later, I promise.
The spoon is done. It’s a process, and one that’s hard to explain. It’s fifty percent micro-managing, fifty percent letting go and just seeing what happens. I think that’s why I like making them so much. They’re utilitarian, but also sculptural. They’re designed for use, but I like the idea that people are almost intimidated to use them. ‘It’s just too pretty,’ someone told me once, when I asked her if she used the spoon I made for her much. ‘Use it, it’s just wood,’ I told her. ‘That stuff grows on trees.’
A time-lapse of one of the spoons being carved
Toys Toys Toys!

Some projects are destined to be great from the beginning. This project was one of those.
I met Lori Paranjape after I had worked on a project with one of her coworkers. She had expressed that she wanted some unexpected elements to the show home she was designing for Barrow Builders, and my name was thrown into the mix.
I could tell from the get-go that Lori just . . . got it. We sat down, discussed some of my prior projects and she showed me the floor plans and renderings. I always prefer to see a site in person to wrap my brain around it, but as this house was literally just studs at this point, drawings it was.
I went to my drawing board and spent some time working on ideas. I wanted something really fun and innovative that would make a show stopping background for this playroom. It had to be gender neutral, whimsical, but still sophisticated.
The first idea I pitched included filling the wall with a massive composition comprised of chalk. A series of 3” deep wooden frames of various sizes stacked on top of each other, then installed at an angle to create some really strong movement. Then filling those frames with thousands of pieces of chalk, with only the ends exposed. We both loved the idea, but it somehow just wasn’t right.


The second idea was a large scale iteration of a doll house cross-cut so that it only protruded a few inches from the wall, sort of like a three dimensional line drawing. I would then assemble grids inside the room of a single object en masse to denote what the room was. For example, miniature copper pots covering the ‘kitchen’ wall. This was such a great idea, one that we came up with together, until I ran the numbers. The materials for just the miniature grids would have been 70% of the budget alone. Hmm, not gonna work.
We both had a sort of epiphany moment when we looked back through some of my past work, and Lori pointed out that she loved the excessively organized quality to a lot of my work. I realized this was the character quality that I wanted to emphasize in the room, and we both decided a solid grid work was just what this room needed. I loved the contrast of a kids room, literally designated to be the messy space, had an element of OCD organization to it. Hmm, a strong contrast of ideas in one work? Sounds about right.

I started collecting toys en masse. Rubiks cubes, army men, spinning tops, yo-yos, rubber duckies, tiaras, etc. I always love the sourcing of my materials, and the strange looks I always get. Figuring out the quantity of materials needed for projects like this is always tough. I decided the spacing between each piece, finalized the composition with Lori, and did a LOT of math. Once I knew that magic number, I added an extra 30% to account for any mistakes. A great rule of thumb I interpret loosely for any project that requires a TON of material is to figure out how much you need, and then double it. You’ll probably be close.


The toys were mounted onto rigid insulation foam, fast and easy. Then painted using a Wagner paint sprayer in a custom color.
Next, it was on to assembly. Each toy needed a single nail glued to the back. That nail was then pushed into panels of rigid insulation foam that we had left from another project. Once a paint color was decided on, I sprayed all the pieces directly on the foam. It kept them upright and gave me an incredibly easy way to transport the toys.

The Handy Dandy on a ladder. . . practicing some gymnastics...
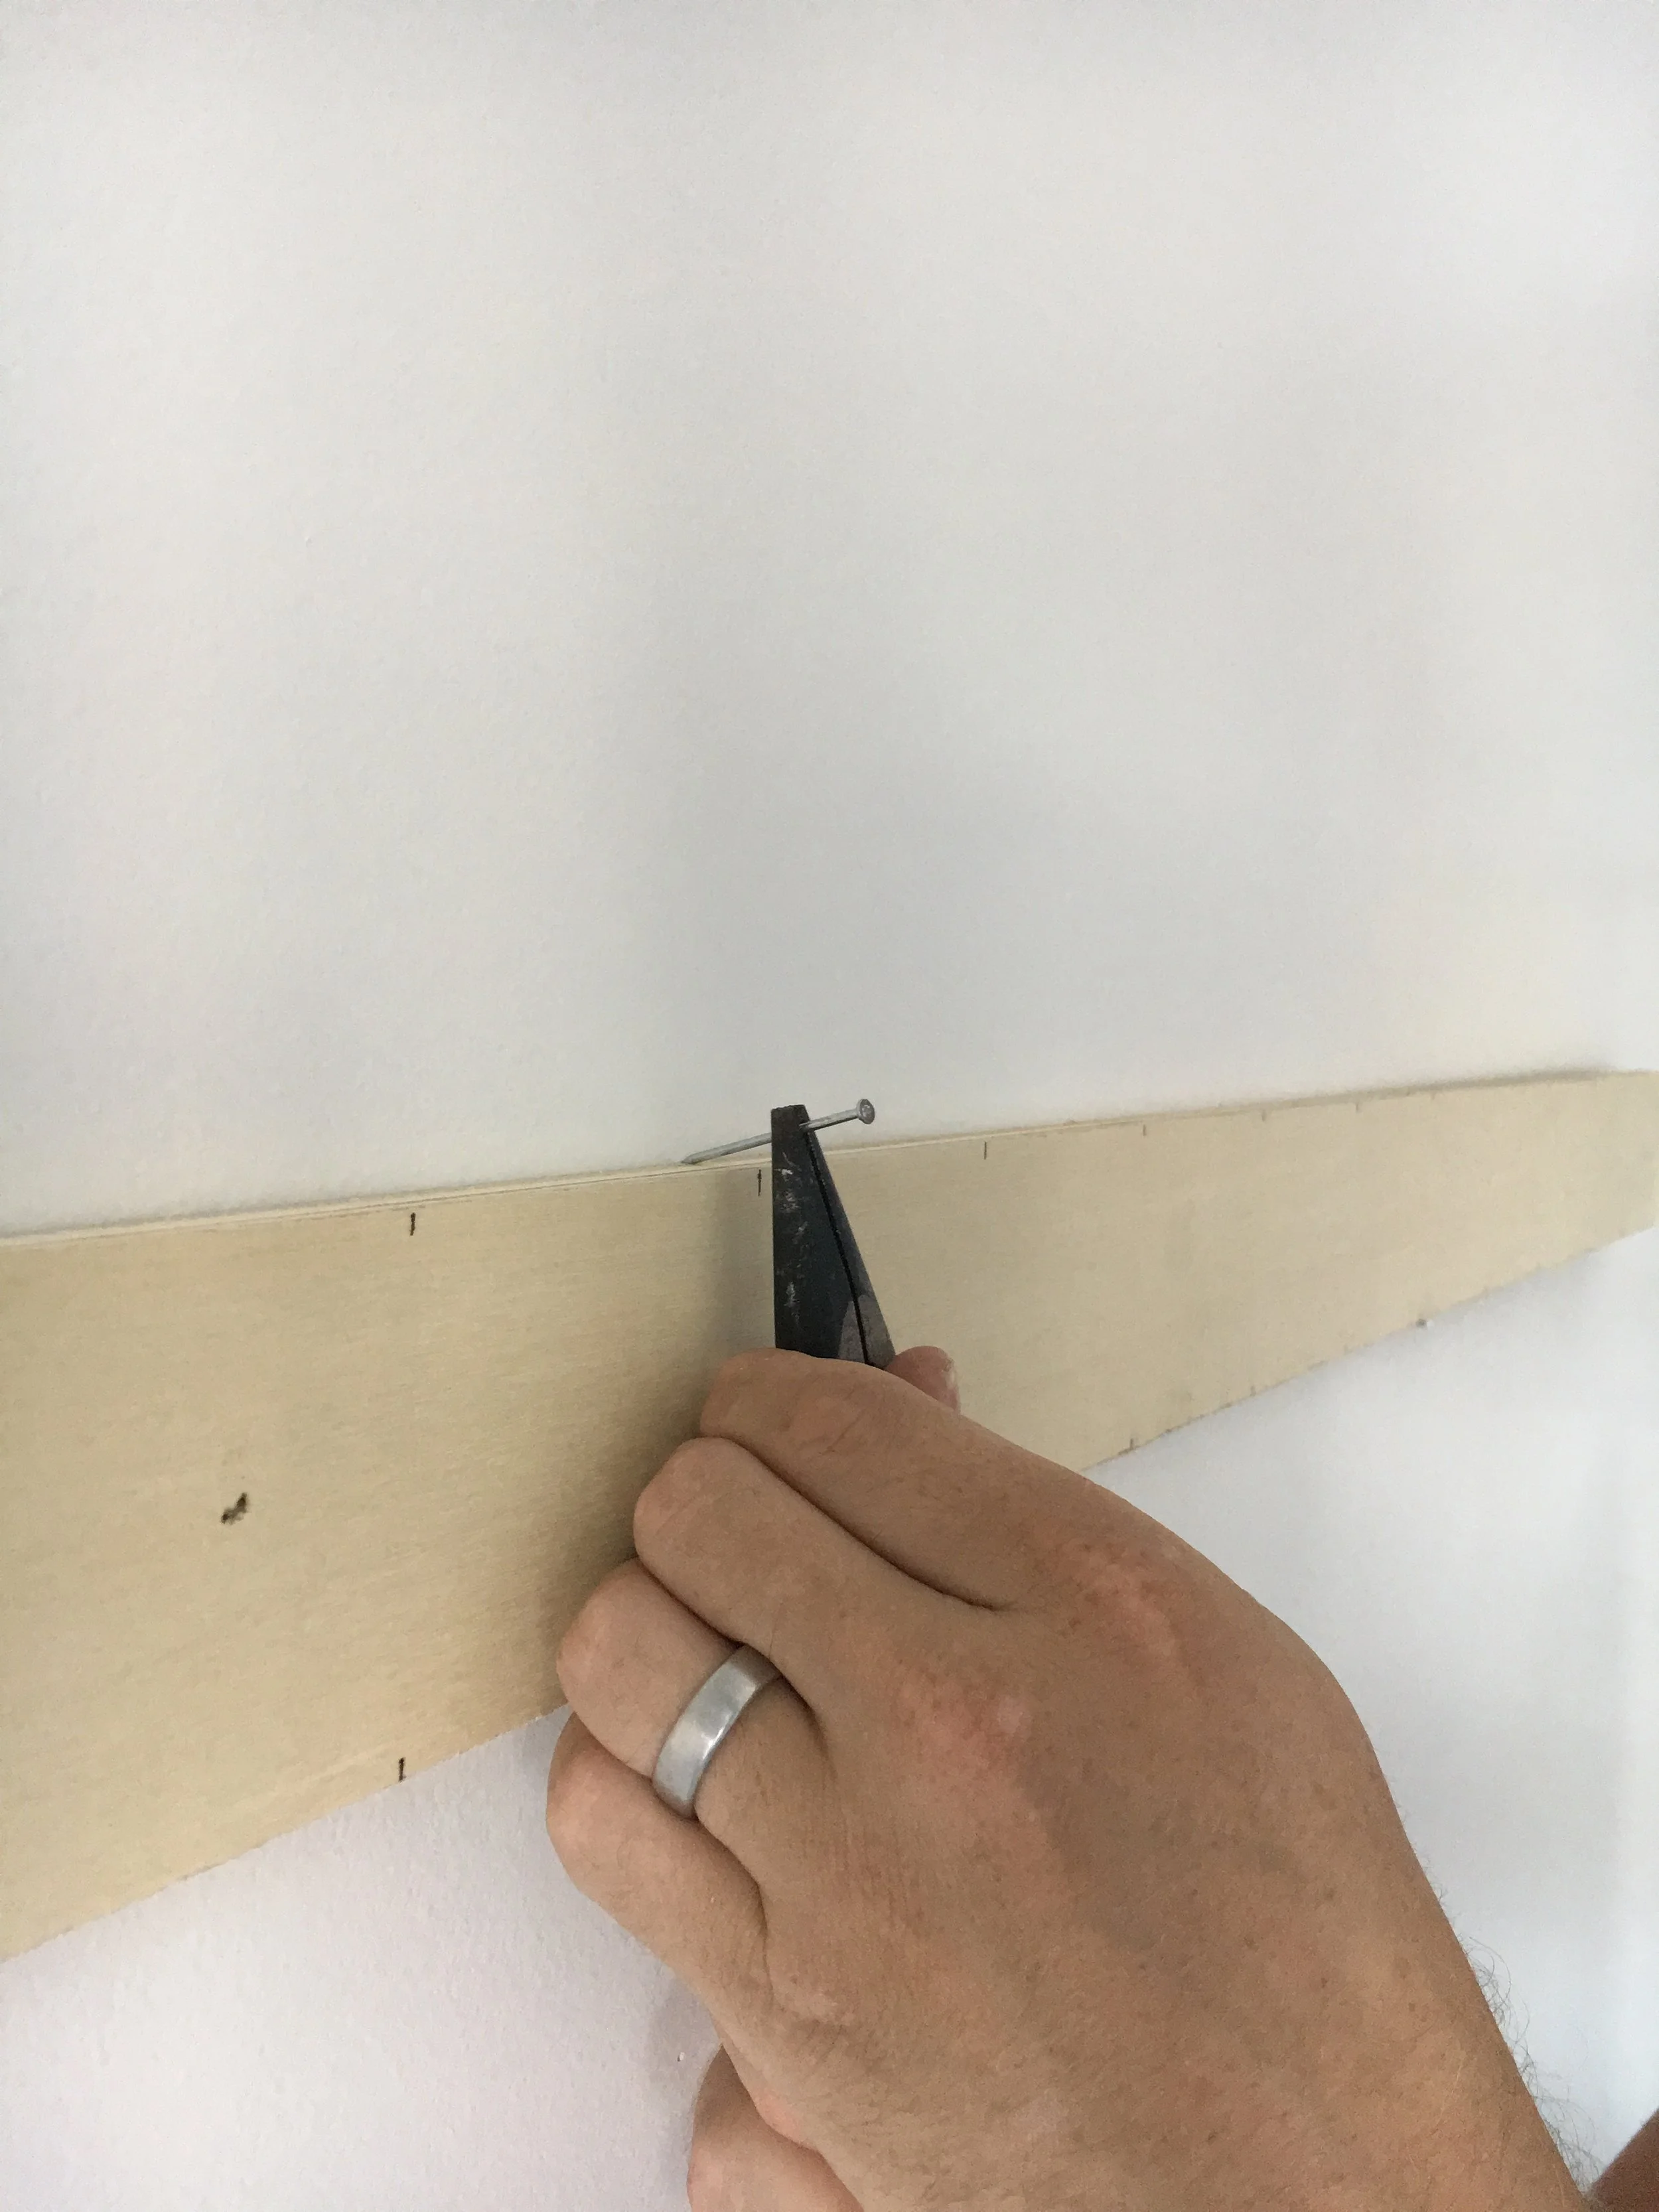
Installation also went incredible well. Making sure your lines are level is always number one priority, as well as your spacing. I’ve learned to use custom spacer boards to make this process a lot easier and fool proof. I marked off the placement for each piece, working from the bottom up. Since the toys were attached to the nails already, I worked from the top down using needle nose pliers to drive each nail into the wall. Overall, the actual installation took about 9 hours on site. Not too bad for such a large piece.
The end product was SO worth it. There’s nothing better than being up close to a work for so long, and then having that moment that I can step back and drool a bit. It’s even better when the whole house gives you the same impression. I'm honored to have been included in a stunning design, and loved working with Lori. Collaboration leads to beautiful things, my friends, and I like beautiful things.


More examples of Lori's incredible work can be found on her website here or her Instagram here!